Creating APIs for SAP SQL Anywhere with DreamFactory
Welcome to our guide on generating an API for SAP SQL using DreamFactory's powerful connector!
In this post, we will explore how DreamFactory simplifies the process of creating and managing APIs for SAP SQL, unlocking the full potential of your cloud-based storage.
Generating the SAP SQL REST API
To start generating your SAP SQL REST API, you’ll login to the DreamFactory administration interface, navigate to the side bar and select the API Connections tab. From there, select API types, then from that dropdown select Database.
Then locate the blue ‘+’ button to the right of the menu to start creating your API.
Step 1: Select your database
Then, from the Service Type dropdown, select the SAP SQL Anywhere connector.

Next, you’ll be prompted to provide a name, label, and description.
The latter two are used just for reference purposes within the administration interface, however the name value is particularly important because as you’ll soon see it will comprise part of the API URL.
Step2: Provide a name, label, and description for your database

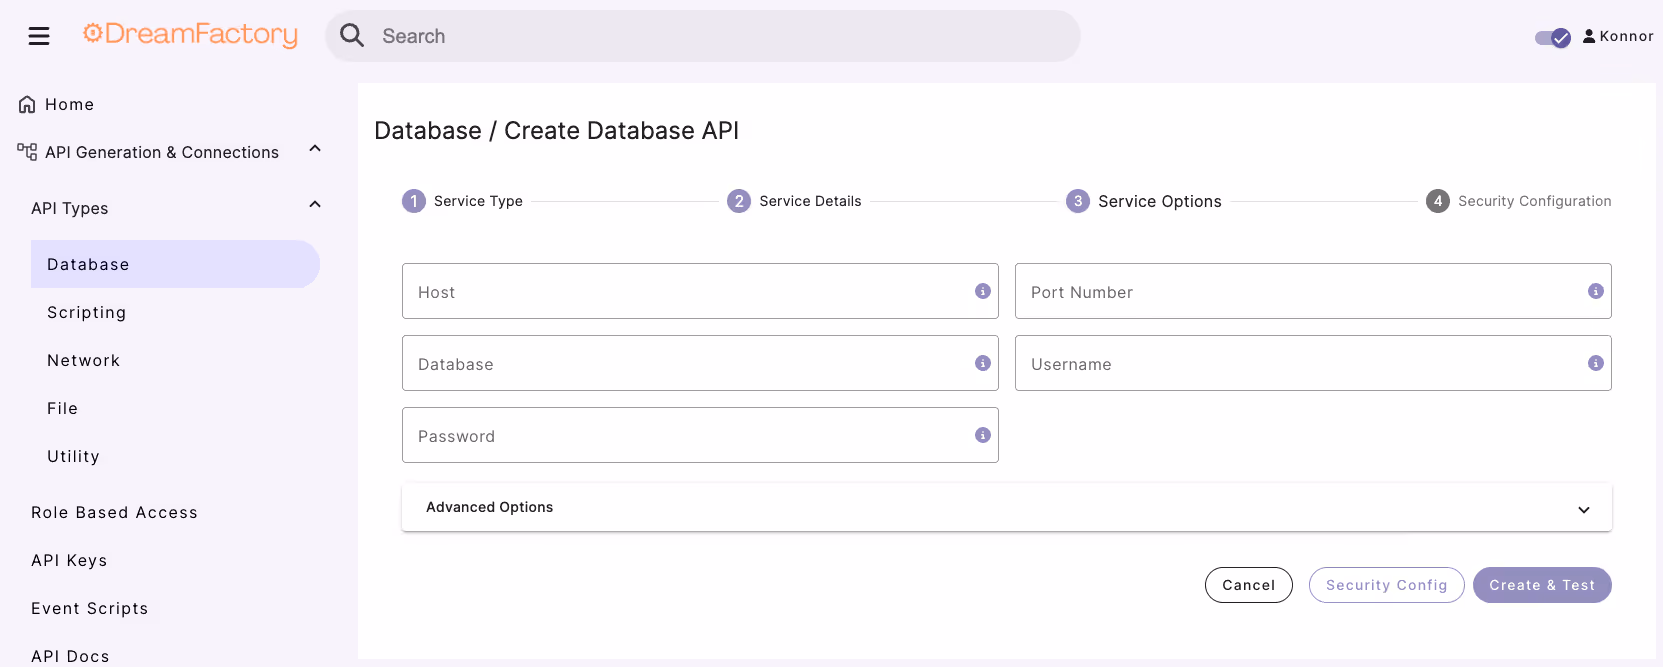
Finally, click on the Config tab.
Here you’ll be prompted to provide the database connection credentials.
This should come as nothing new – you’ll provide a host name, username, password, database, and any other required credentials.
Additionally, you can optionally specify advanced configuration options such as driver settings, additional SQL statements, caching preferences, maximum records, and more.
For the purpose of this tutorial I’ll stick to the required fields and leave the optional features untouched.
Step 3: Enter database connection credentials
With the credentials in place, just press the Save button at the bottom of the screen, and believe it or not the REST API has been generated!
So what happens in the background is DreamFactory not only generates the API but also generates the corresponding documentation and security controls.
From here, navigate to the API Docs to access all your REST API endpoints, interact with tables and views, explore the schema, and utilize HTTP functionalities (GET, POST, PUT, PATCH, DELETE) and more.
Step 4: Interact with your auto-generated API Documentation to find the curl command & request URL

